
I want to run my hardware using modern cloud-like management tools. For me, this means running a Docker Swarm.
Why Docker Swarm?
When evaluating my options such as Docker, Kubernetes, or virtualization with Proxmox, I settled on Docker. I decided that I wanted to run containerized workloads (eliminating Proxmox), and I chose Docker because it has lighter resource usage than Kubernetes. Since I don’t plan on running strenuous loads for an extended period of time, Docker makes the most sense for my use case.
I followed the instructions to set up Docker Swarm on both of my home lab machines. I also set up Docker for Windows on my laptop, as that will provide the various CLI tools I need to reach out to my Docker Swarm. I configured my NUC as a manager node and set up the Raspberry Pi as a worker node.
I like this configuration because I can add new hardware to my home lab quite easily–all I have to do is add the new hardware as another node to the swarm, and Docker will manage scheduling services on the new machine.
Running Services on the Swarm
As I mentioned in my previous post about the hosts in my home lab, I plan on
using Docker Compose files to define each of the stacks (A stack is a Docker
term for a related group of containers that all provide a service). This makes
managing the services identical in terms of the commands I need to run in order
to start, update, and stop services. And since the Docker CLI supports running
commands on remote Docker Engines (using the -H flag), I can run the commands
to manage my home lab from a local shell on my Windows laptop.
# Start the stack
docker -H ssh://docker.nooney.casa stack deploy -c <docker-compose.yml> <stack_name>

# Stop the stack
docker -H ssh://docker.nooney.casa stack rm <stack_name>
With these commands, I can begin to run interesting software on my home lab.
Another View of the Home Lab
The following diagram describes my setup in relation to Docker. I’m happy with how uniform each machine in my home lab is. Having a standard procedure for the shape of my devices makes it much easier to manage.
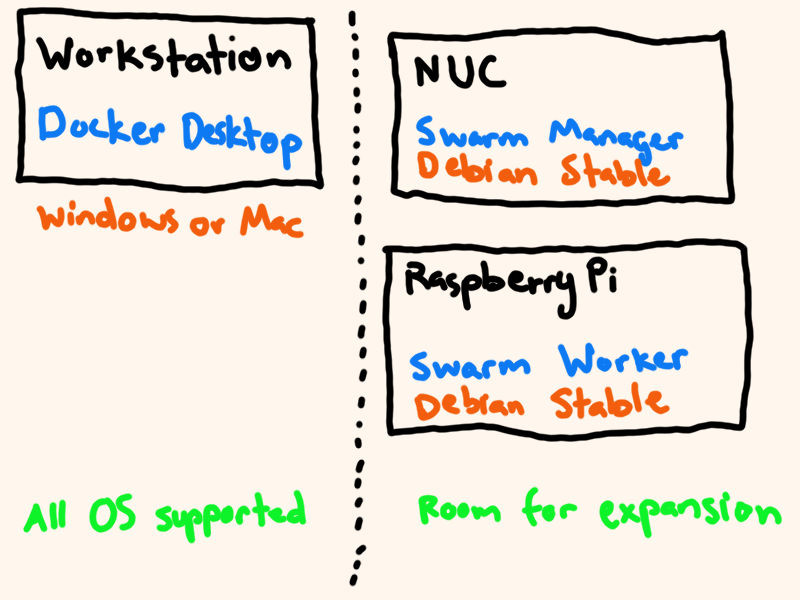
I’m also quite happy with the docker setup on each machine. I did not need to use any non-standard implementation; I followed the Docker installation instructions for my Debian machines and used the Desktop installation for my Windows and Mac workstations.
Software Configuration
One of the greatest benefits of this approach, besides the easy expansion of physical hardware, is that all of my configuration is expressed in code. This allows me to use a version control system to maintain history of my home lab.
All the configuration files for the services running on my home lab can be found on GitLab. Future posts will discuss individual services that I set up.